Cheese balls part 1: bellows cheese and cow’s milk cheese
Cheese balls part 1, the beginning of the cheesy balls series! A beloved snack that can be enjoyed by people of all ages. Whether you’re planning a casual get-together, a sophisticated party, or just looking for a delicious treat to enjoy at home, homemade cheese balls are a perfect choice. Let’s explore how good and easy it is to make these delightful, cheesy bites!
The appeal of homemade cheese balls
Cheese balls are an ideal appetizer or snack because they are flavorful, versatile, and easy to prepare. The creamy texture and rich taste of cheese, combined with the right blend of spices, create a delightful explosion of flavors in every bite. Here are some reasons why homemade cheese balls are a hit with everyone:

Versatility for all ages
This is one of the most significant advantages of homemade cheese balls: their versatility. They can be tailored to suit the preferences of kids, adults, and everyone in between. For kids, you might opt for a milder cheese and simple seasonings, while for adults, you can experiment with stronger cheeses and more complex spice blends. But that will be for later recipes from this series, as this is just Part 1!
Perfect for any occasion
Cheese balls are perfect for any occasion, from casual family dinners to festive holiday gatherings. They can be served as appetizers, snacks, or even as part of a larger spread of party foods. Their bite-sized nature makes them easy to eat and serve, adding a touch of elegance to any table. For example, my mother-in-law made 5 batches of these for our wedding. And they were the first to disappear from all the plates!
Easy to customize
One of the joys of making homemade cheese balls is the ability to customize them to your liking. You can mix and match different types of cheese, add various spices, and even incorporate other ingredients like nuts, herbs, or dried fruits. This flexibility allows you to create a unique and personalized snack every time. You can also personalize how big you make them. They are exceptional both small and crispy, but also big and ooey-gooey on the inside.
Homemade cheese balls part 1 – the easiest recipe
Making homemade cheese balls is surprisingly easy and requires minimal ingredients and equipment. Here’s why this delightful snack is a breeze to prepare. And by the way, you can involve any small hands to make these. Kids can help with grating, with mixing and, of course, making the balls.
Simple ingredients
The ingredients for cheese balls are simple and likely already in your kitchen. All you need is cheese, spices and oil for frying.
Minimal preparation
The preparation process is straightforward and doesn’t require any cooking. Simply mix the ingredients, shape them into balls, and fry to your desired gold nuance. The entire process takes less than an hour, making it a quick and convenient snack to whip up anytime.
No special equipment needed
You don’t need any special equipment to make cheese balls. A mixing bowl, a spoon, and your hands are all you need to create these delicious treats. If you have a food processor, it can make the mixing process even quicker, but it’s not necessary.

When do we make these homemade cheese balls part 1 (specifically this combo)?
Anytime, really! My mother-in-law makes them every Christmas. We also started making them on various occasions. Even when we recorded the video and made the photos for this article, we actually made more batches because we kept eating them all.
The benefits of homemade cheese balls
Making cheese balls at home has several benefits beyond just their delicious taste:
Healthier choice
When you make cheese balls at home, you control the ingredients. This allows you to avoid unnecessary additives and preservatives found in store-bought versions. You can also adjust the amount of cheese and spices to suit your dietary preferences.
Cost-effective
Homemade cheese balls can be more cost-effective than buying pre-made snacks, especially if you already have the ingredients on hand. Plus, you can make a large batch and freeze the leftovers for future enjoyment. But typically there are no leftovers. They disappear so easily!
Fun to make
Making cheese balls is a fun and interactive activity that can involve the whole family. Kids will enjoy rolling the cheese mixture into balls, making it a great way to spend time together in the kitchen. And even if you don’t have kids, it’s a fun activity between gals – to roll balls and talk about nothing and everything.
Homemade cheese balls are a delightful and easy snack that brings comfort and joy to any occasion. Their rich, creamy texture and customizable nature make them a favorite among food enthusiasts of all ages.
So, what are we waiting for? Let’s make a delicious batch of homemade cheese balls!
Homemade cheese balls
Course: Main, AppetizersCuisine: American, EuropeanDifficulty: Easy8
servings20
minutes15
minutes350
kcal35
minutesIndulge in the rich and tangy flavors of homemade cheese balls, a delightful appetizer perfect for any occasion. Made with a blend of creamy bellows cheese and cow’s milk cheese, these cheese balls are seasoned with a hint of ground white pepper and lightened with a touch of baking powder. Enjoy their smooth, melt-in-your-mouth texture and the irresistible taste that will keep guests coming back for more. Ideal for parties, gatherings, or a delicious snack at home, these cheese balls are easy to make and even easier to enjoy.
Ingredients
300 grams bellows cheese*
400 grams cow’s milk cheese*
2 whole eggs
5–6 tablespoons all-purpose flour
1 sachet baking powder
1/2 teaspoons ground white pepper
Directions
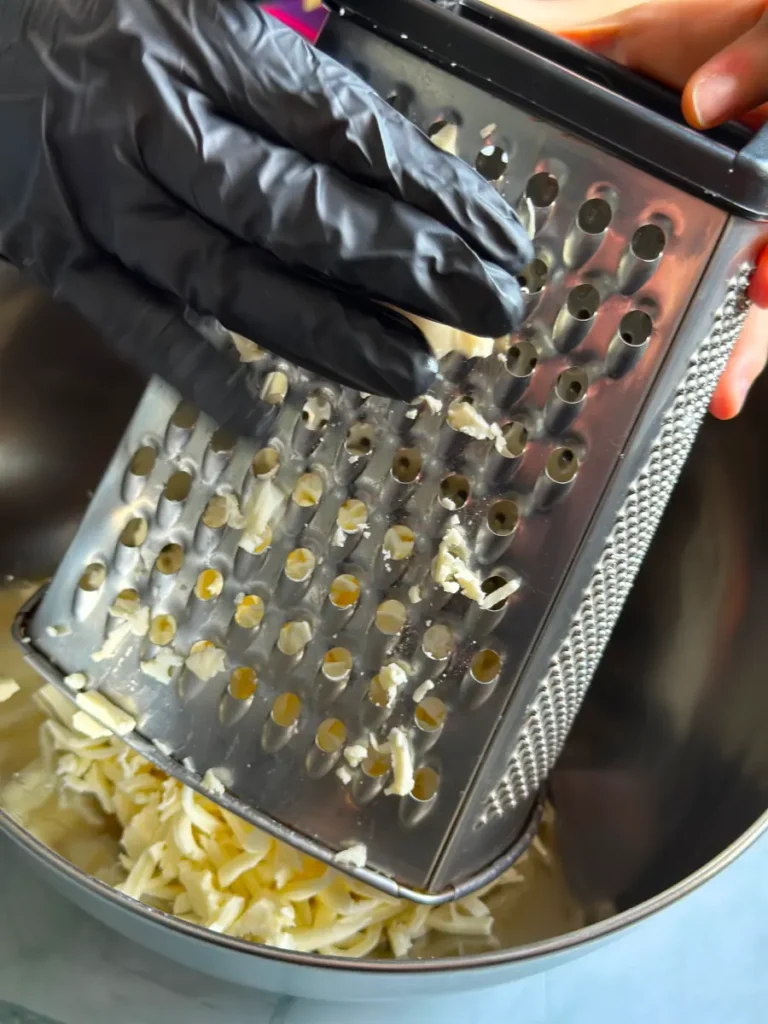
- In a large bowl, grate your 2 types of cheese. Break in the whole eggs and add the sachet of baking powder, ground white pepper, and all-purpose flour.
- Mix firmly until all the elements are well combined. If you feel that the mixture is too moist and sticky, gradually add in a little more all-purpose flour. The mixture should handle easily and unstick from your hands once the balls are formed. Form the cheese balls and place them on a floured surface or on a tray lined with parchment paper.
- Heat up the oil. For the best results, the cheese balls should be mostly covered in oil. Use a deep fryer or a deep pan. Once the oil is heated, add 6–8 balls and fry them until golden brown. If your oil is heated enough, this should take about 30-45 seconds per batch. Remove them on some paper towels to remove the excess oil. Enjoy!!!
Notes
- *You can mix up the cheese selection for this recipe. The ones we use have a higher fat content (35–45%) and a semi-soft, creamy (almost spreadable) texture.
- Spices are also subject to change. We usually go for the classics, as we use them as appetizers or combined with other dishes.
- Other ingredients can also be added, like chili, ham, olives, baked potatoes, etc., BUT keep in mind that the frying time is about 30-45 seconds. We will release future recipes with different additions in the mixture on our blog.
If you love these cheesy balls and would like to test out other goodies that are just as easy to make, I would recommend: Homemade cheese sauce with pasta or the cheesy ham rolls.



2 Comments